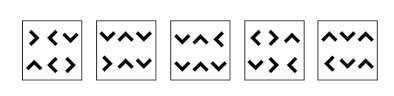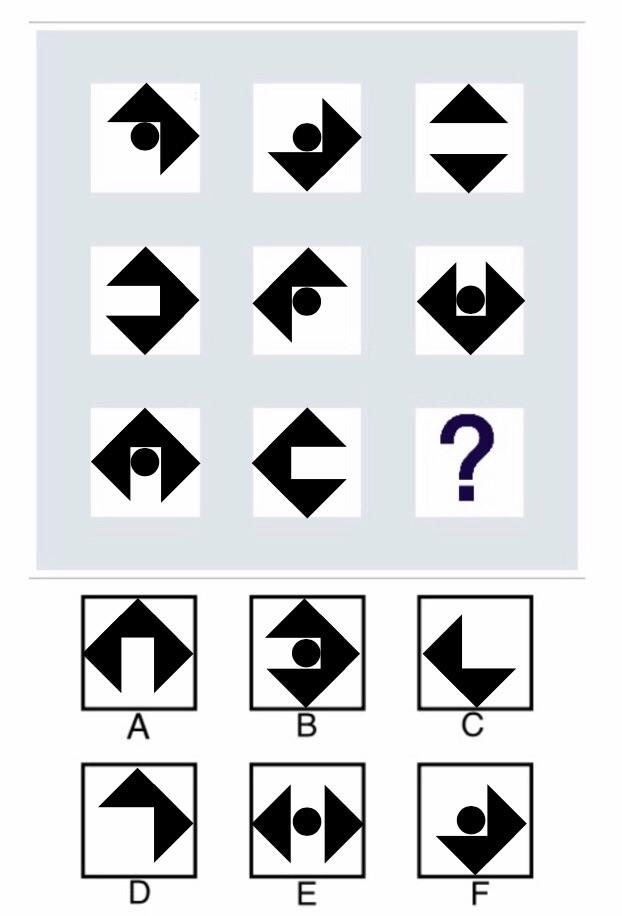
Which of the shapes (A-F) should replace the question mark?
Scroll down for a clue and further down for the answer.
*
*
*
*
*
*
*
Clue: If an image appears twice it cancels out, if it appears once it remains.
Scroll down for the answer.
*
*
*
*
*
*
*
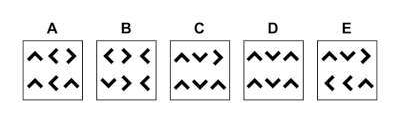
Answer: F
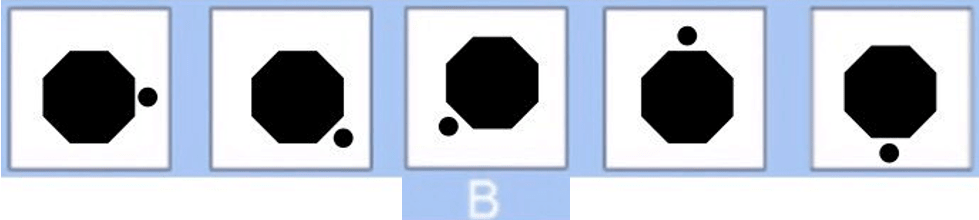
If a shape appears once in the first two columns then it will appear in the third column. If a shape appears twice in the first two columns, then they cancel out and don’t appear in the third column.
Focusing on the third row, first and second images, the ball only appears once so it will feature in the third image. The upwards arrow appears twice so cancels out and won’t appear in the third image. The right arrow only appears once so will appear in the third image. The downwards arrow only appears once so will appear in the third image. The left arrow appears twice so cancels out and won’t appear in the third image. This leaves us with:
The ball, the right arrow, the downwards arrow. This is represented in option F which is the answer.